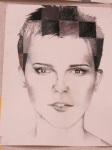
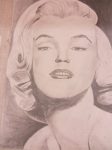
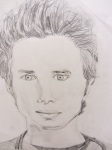
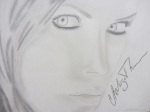
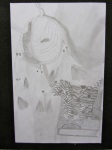
After a ton of practice drawing portraits the art fundamental and drawing/painting students were challenged to draw a final portrait of anyone they would like. This could be a self portrait, family or friend portrait, or celebrity portrait. I learned just how much high school students love taylor swift during this time. Several male and female students slaved over shading every ringlet curl and long eyelash trying to get her likeness just right. You can see what a range of skill levels the class has as well. See if you can identify the students other favorite celebs in the drawings below too:
notjustanelective
Just another WordPress.com site
Category Archives: Uncategorized


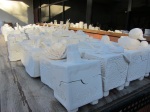
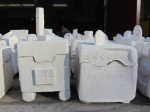
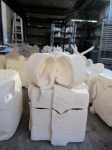
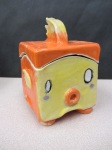
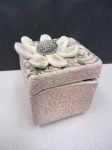
Slab Boxes
Day off and time for some updates to the blog! Here are some slab boxes made by my high school ceramic students. The awesome hand-out of making slab boxes is from http://home.comcast.net/~john_norris_net/ .
This project was practice with slabs leading up to the students creating even larger more irregular form slab boxes that related to a theme of their choice. Once they mastered the small 4x4x4 slab box they had the skills needed to make their theme box. Themes included a fish shaped tackle box or a guitar shape box to hold concert tickets.


Teaching Requirements
A month since my last update should be an indicator of how busy this last month has been. It was my last month as a student teacher and bittersweet as I said goodbye to all my students, my master teachers, and entered the last grade into the grade book. The good news is that I now see them as a substitute teacher from time to time. The last month was filled with lots of amazing artworks and fun final projects that I will be posting about when I get time to catch my breath as I transition into the life of a sub. For now I leave you with this poster that I found on http://busyteacher.org that I think all teachers will relate to.

Keeping an art journal/sketchbook
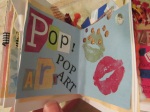
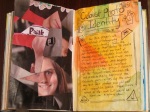
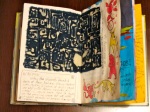
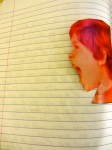
One of my new favorite resources as an art educator is Pinterest (www.pinterest.com) it is a digital pin board and idea sharing website and the perfect place for artist to swap and share ideas for lessons. Some of my favorite pins involve sketchbooks and art journals, especially this article on Keeping a Visual Journal. I’ve always kept a sketchbook to take notes in, sketch ideas, develop skills, easily draw outside on a hike, and just be creative in a place where no one can judge my work. Sometimes I paint in a sketchbook to write and draw in later because white paper can be so intimidating. Sketchbooks don’t have to be filled with plain sketches and journals don’t have to contain just writing. Here are some of my sketchbook pages showing that there is no wrong way to keep a sketchbook or visual journal, use text, collage, paint, pencil, photographs, internet sources, items lying around your house, and ideas from your head.


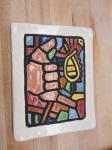
Autobiographical Still Life


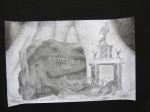
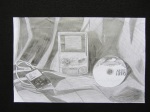

It been awhile since I showed off what the Art Fundamentals students are working on. They have been drawing, drawing, drawing, in order to master shading and observational drawing skills. The final lesson in the unit had students choose objects that represented them to render into a still life. You can see that all their practice leading up to this point paid off.
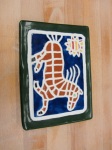
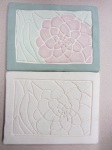
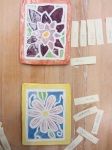
Ceramic Tiles
Here is a lesson on making uniquely designed ceramic tiles which can be adapted for any grade:
Topics: Element of line, slab-rolling, grouting, glazing, and art criticism.
Content Standard Reference (High School Proficient):
1.4 Analyze and describe how the composition of a work of art is affected by the use of a particular principle of design.
2.1 Solve a visual arts problem that involves the effective use of the elements of art and the principles of design.
4.5 Employ the conventions of art criticism in writing and speaking about works of art.
Objective: Students will create a ceramic tile and demonstrate understanding of design elements, shape and line, by simplifying an image onto the tile. Student will demonstrate competency and understand the process of glazing by low fire glazing their tile. Student will develop critique skills to become objective evaluators of each other’s work as well as their own by participating in an in class critique.
Simplified steps:
1. Students completed a worksheet on line where they simplified a given image into its basic shapes and lines.
2. They then created their own unique simplified line drawing.
3. Students then transfered their drawing onto a 6″x8″ slab of clay, 1/2″ thick, with about a 1/2″ border.
The slabs were rolled out using rolling pins and 2 rulers stacked on each side as guides.
4. Students carved their drawing out of the now leather-hard slab using a trimming tool
5. After the bisque firing students glazed their tiles.
6. After the glaze firing a batch of black, white, and grey grout was mixed to fill in the lines the student had carved out. The students covered their tile with their choice of grout, let it set for a minute, then wiped off the tile with a sponge so that the only grout remaining filled in their design.
Now what you really care about, the awesome student work:

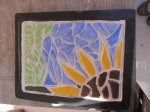


| Lesson ended with the art criticism activity where students each awarded one tile “best use of line”, “best use of color”, “best overall design”, and a “free choice” award. Once they had given their awards the class discussed why a tile was successful in use of line, color, design, etc…
|
Double Pinch Pots and Animals
Double pinch pots are the perfect project for ceramic beginners. Here is how its done:
1. Start by creating 2 small pinch pots by pinching from the center of a sphere of clay outwards.

2. Place the two pinch pots on top of each other.

3. Smooth together and shape this hallow piece of clay into the shape you want. Leave the air trapped in there for now while the clay sets up.

4. Add to the double pinch pot to create and animal, vase or lidded pot. Be Creative and make sure to slip and score all attachments!


5. Before bisque firing make sure to poke a hole anywhere that there is air trapped or your project will end up like this poor penguin and platypus. The air has to escape somehow.


After the bisque fire my class used low fire glazes for their bright colors.


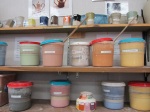
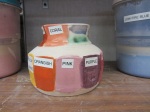
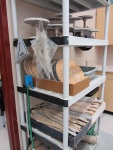
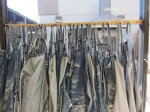
Ceramics room organization
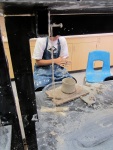
Keeping my ceramics classroom organized is the only thing that keeps me sane some days. With all the tools, glazes, and works waiting for firing there is a lot to fit into a relatively small space. Lucky for me, the class just got a remodel complete with lockable cabinets with cubbies for each student. Also lucky for me, my master teacher has some amazing ideas for classroom organization, most of wish he built himself. My favorite is the rack he just build to hold mid-fire glazes, oars for stirring glaze, oxides, and tongs all on one rack complete with WHEELS! Everything is on wheels which makes it really easy to move things around if you want more space for demos. Also, the kiln yard is fabulous with shelfs labeled greenware, low fire, and mid fire for all periods so students always know where their work goes and learn about firing stages at the same time. Some other things you may notice is the use of nails to hang things like right angle rulers on the side of a shelf, aprons, or wire tools above the ceramic wheels for easy access when a student is ready to remove their work from the bat. Who knew a few nails in some clever places could solve so many organizational issues? Did I mention my master teach is incredible for coming up with all of these? I’m so thankful I have a mentor who will share these ideas with me. I’m posting them here not only to share that great ideas with other teachers but also to help me remember when that day comes where I have my own classroom (fingers-crossed).


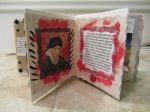
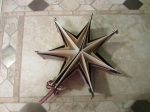
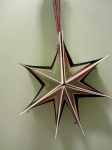
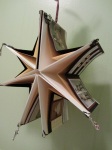
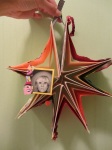
Artist Research Star Book
One of my jobs as a student teacher is to bring a new perspective into the lessons. One of the first lessons I “updated” was the art fundamental students artist research paper. Instead of students picking an artist to research and write a paper on I had them make star books on the artist of their choice. I found the instructions for making the books here: http://www.making-mini-scrapbooks.com/starbook.html except I had students bind their books by gluing two paper strips across the binding for extra support. Students spent some time throughout the month of October researching an artist of their choice. They even creating a replica of that artist’s work which I then shrunk down into an image to fit inside their book. The results were creative masterpieces instead of boring research papers and are a lot more exciting to make and display. I supplied them with scrapbook paper and miscellaneous objects to make their books really pop. The last picture is the grading rubric used for this assignment but if your interested in the whole packet, instructions, ect… leave a comment with your email.